Third Angle Projection
第三角法
Daisankakuhou
CATEGORIES
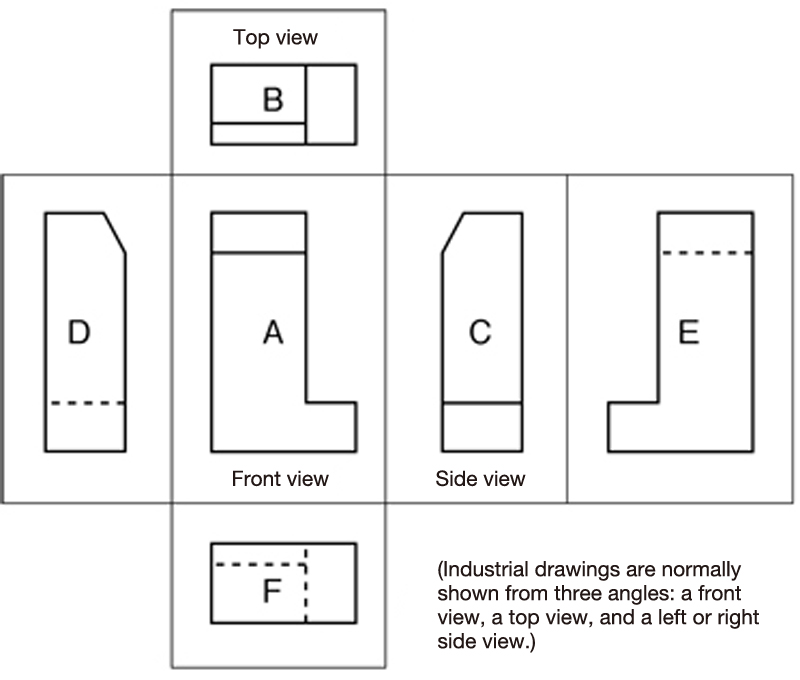
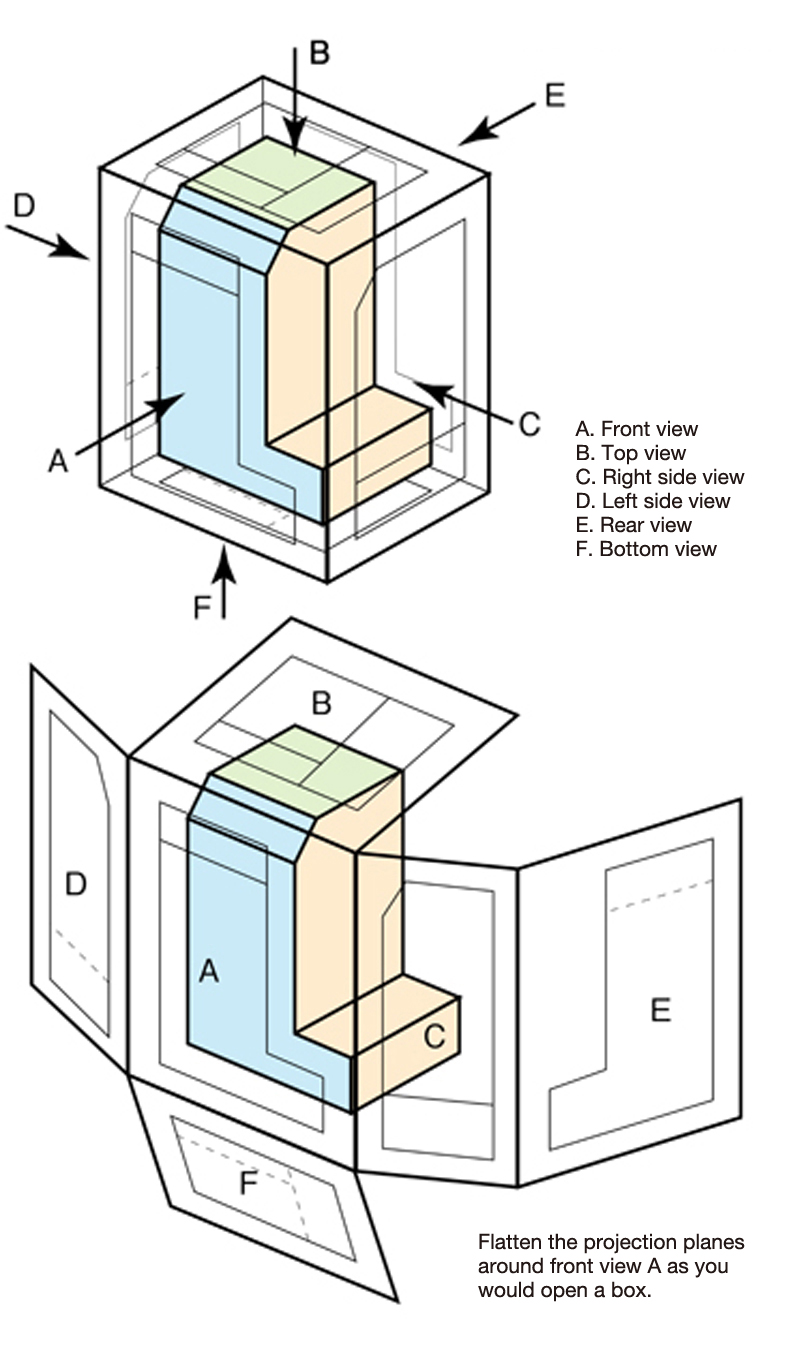
Third angle projection is one of the methods of orthographic projection used in technical drawing and normally comprises the three views (perspectives): front, top and side. Orthographic projection is a method of expressing a three-dimensional object on a flat surface and has the advantage of enabling the form of an object to be displayed accurately. The way in which we position these three views, differentiates third angle projection from first angle projection.
When using third angle projection to compile a diagram of the three views, we first draw the most prevalent side of the object as the front view. The top view is positioned directly above the front view and for the side view, we generally position the right side view on the right of the front view. (If the left side is used, it is positioned on the left side.) The respective views are thus placed in their prescribed positions. It is particularly important to note that the top view is to be placed above the front view. If the views are wrongly placed, it could be mistaken for a first angle projection or not provide accurate information. (In a first angle projection, the top is placed below the front and the right side view is placed on the left.) The first angle projection is mainly used in Europe and the third angle projection is mainly used in the United States. In Japan, JIS (Japan Industrial Standards) stipulates that the third angle projection be generally used for designs for product fabrication.
RELATED PAGES
 Third angle projection
 The concepts behind third angle projection
