How to Stretch a Canvas
キャンバスの張り方
Canvas no harikata
CATEGORIES
The construction of a stretched canvas, which is used primarily in oil painting, is (as the name implies) a canvas that has been stretched and affixed to a wooden frame. Artists can easily stretch canvases themselves in various forms and sizes depending on the artist’s vision.
The essential materials and tools for stretching canvases are: a wooden frame, a canvas (which must be larger than the frame; each side should = the length of the frame + (the thickness of the frame + 2-3 cm.) x 2), a canvas stretching tool (a plier-like tool used to stretch the canvas), tacks (nails), a wooden mallet, a hammer, scissors or a cutter, a triangular ruler, and a nail remover (a flat-bladed screwdriver may be used). An appropriately humid space or a rainy day is best for stretching canvases. Because canvases stretch and contract in response to humidity, canvases stretched when they are dry may grow slack when humidity rises.
The process of stretching a canvas begins with the assembly of the wooden frame. Paying attention to which side of the wooden pieces to be used for the long and short sides are facing, the frame is assembled by connecting the pieces at the four corners. After inserting them in little-by-little by hand, the wooden mallet is used to tap the connection tight. Since the frame also has one or more crosspieces on the back side, this should be put in place as the frame is being assembled. After assembly is completed, each corner should be checked using the triangle to verify that it forms a right angle. Next, the canvas is turned upside down and the frame is placed upon it at an equal distance from each edge of the canvas. At this point, the cross-section of the wooden frame should tilt slightly toward the inner side, and the curved face (the front side) should face the canvas. The canvas is attached to the frame by pinching the canvas with the stretching tool from the back side of the wooden frame and then stretching it using the lever principle to stretch it tight (using equal force in each spot). Once it is pulled tight, tacks are nailed in using the hammer. Tacks should be inserted in sequence, moving from the center of the wooden frame outwards. Normally tacks are placed in alternating, opposing positions, but it is also acceptable to tack the center of each side, then the four corners, and finally the points between the centers and the corners. The distance between tacks will vary based on the size of the frame, but they should always be placed at equal intervals and at an appropriate distance to prevent deviations or warping. The final step is to fold over the extra canvas at each of the corners and then tack it in place. Should there be a wrinkle in the canvas, take the tacks out around that portion and re-stretch it using the stretching tool before tacking it down again. Additionally, used canvases may be re-used by removing it and then re-stretching it. When a simple stretch is acceptable, a gun tacker may be used instead.
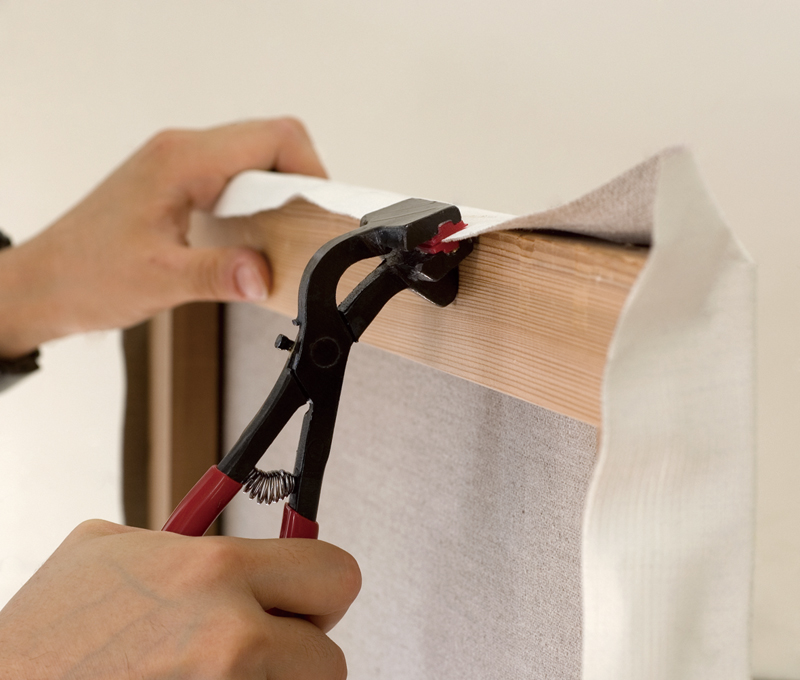
- Tools for stretching a canvas
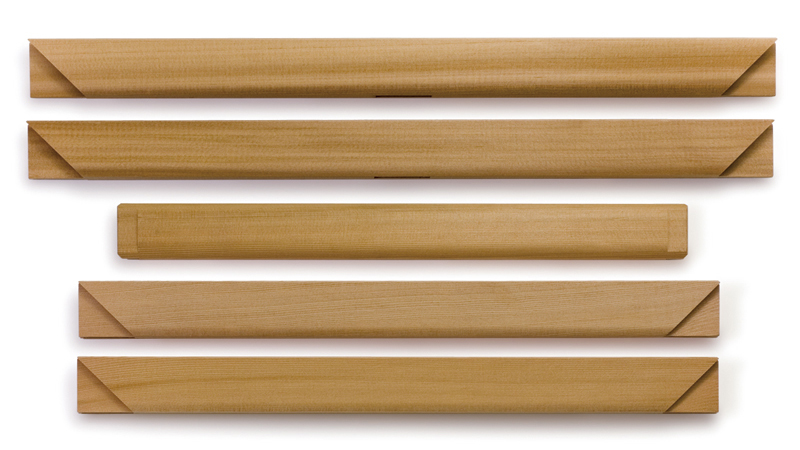 Stretcher frame
 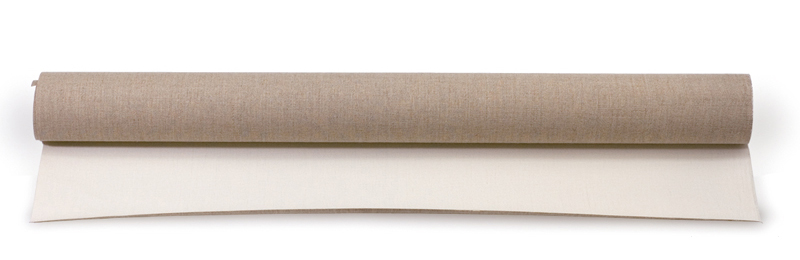 Canvas
 Canvas stretching tool
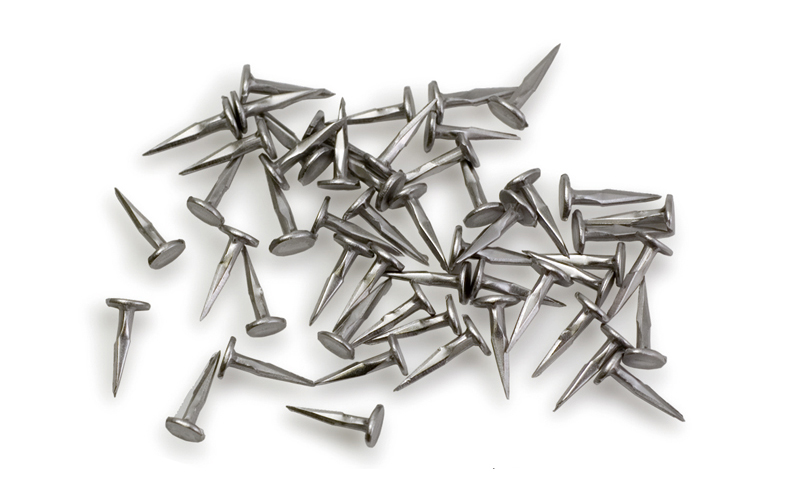 Tacks (canvas nails)
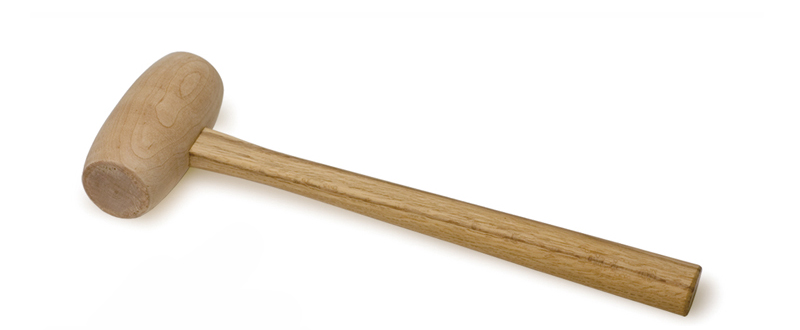 Wooden mallet
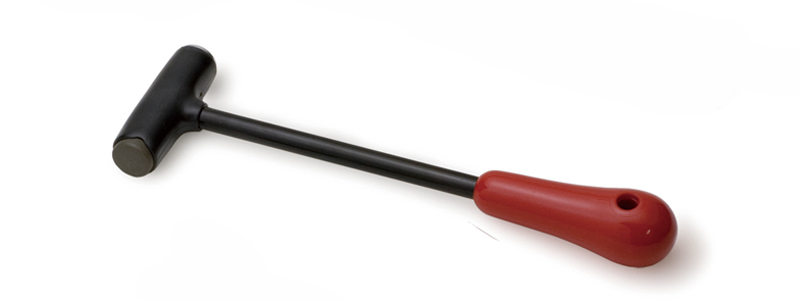 Hammer
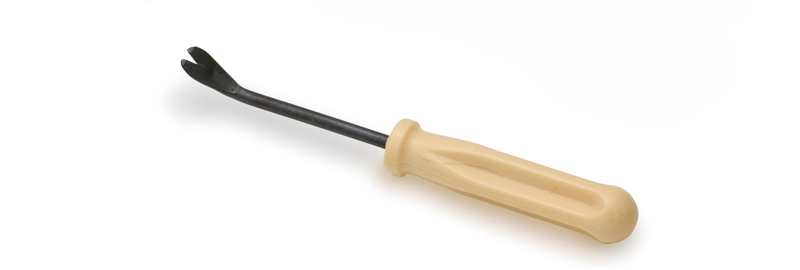 Nail remover
- How to attach tacks (permanent)
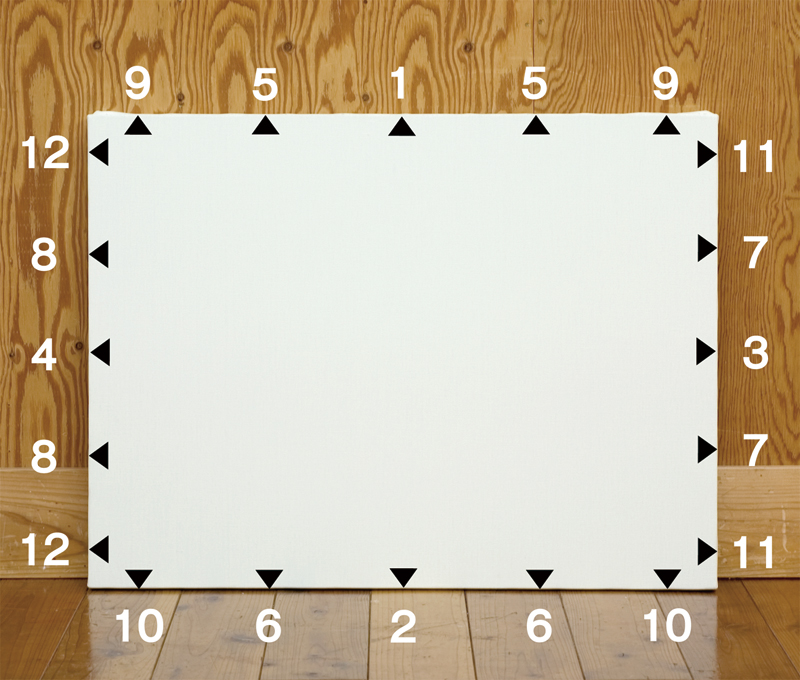 Example 1
 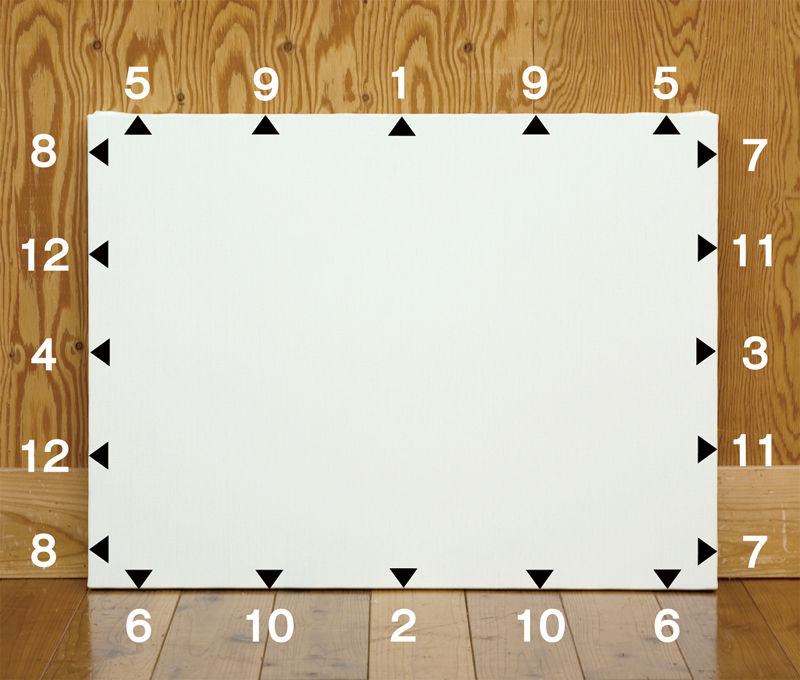 Example 2